

Access Policies
Overview
Section titled “Overview”Policies control who can request what resources, auto-approval rules, and break-glass permissions using Cedar policy language. Policies are evaluated in priority order and can be reordered via drag-and-drop.
Browsing Policies
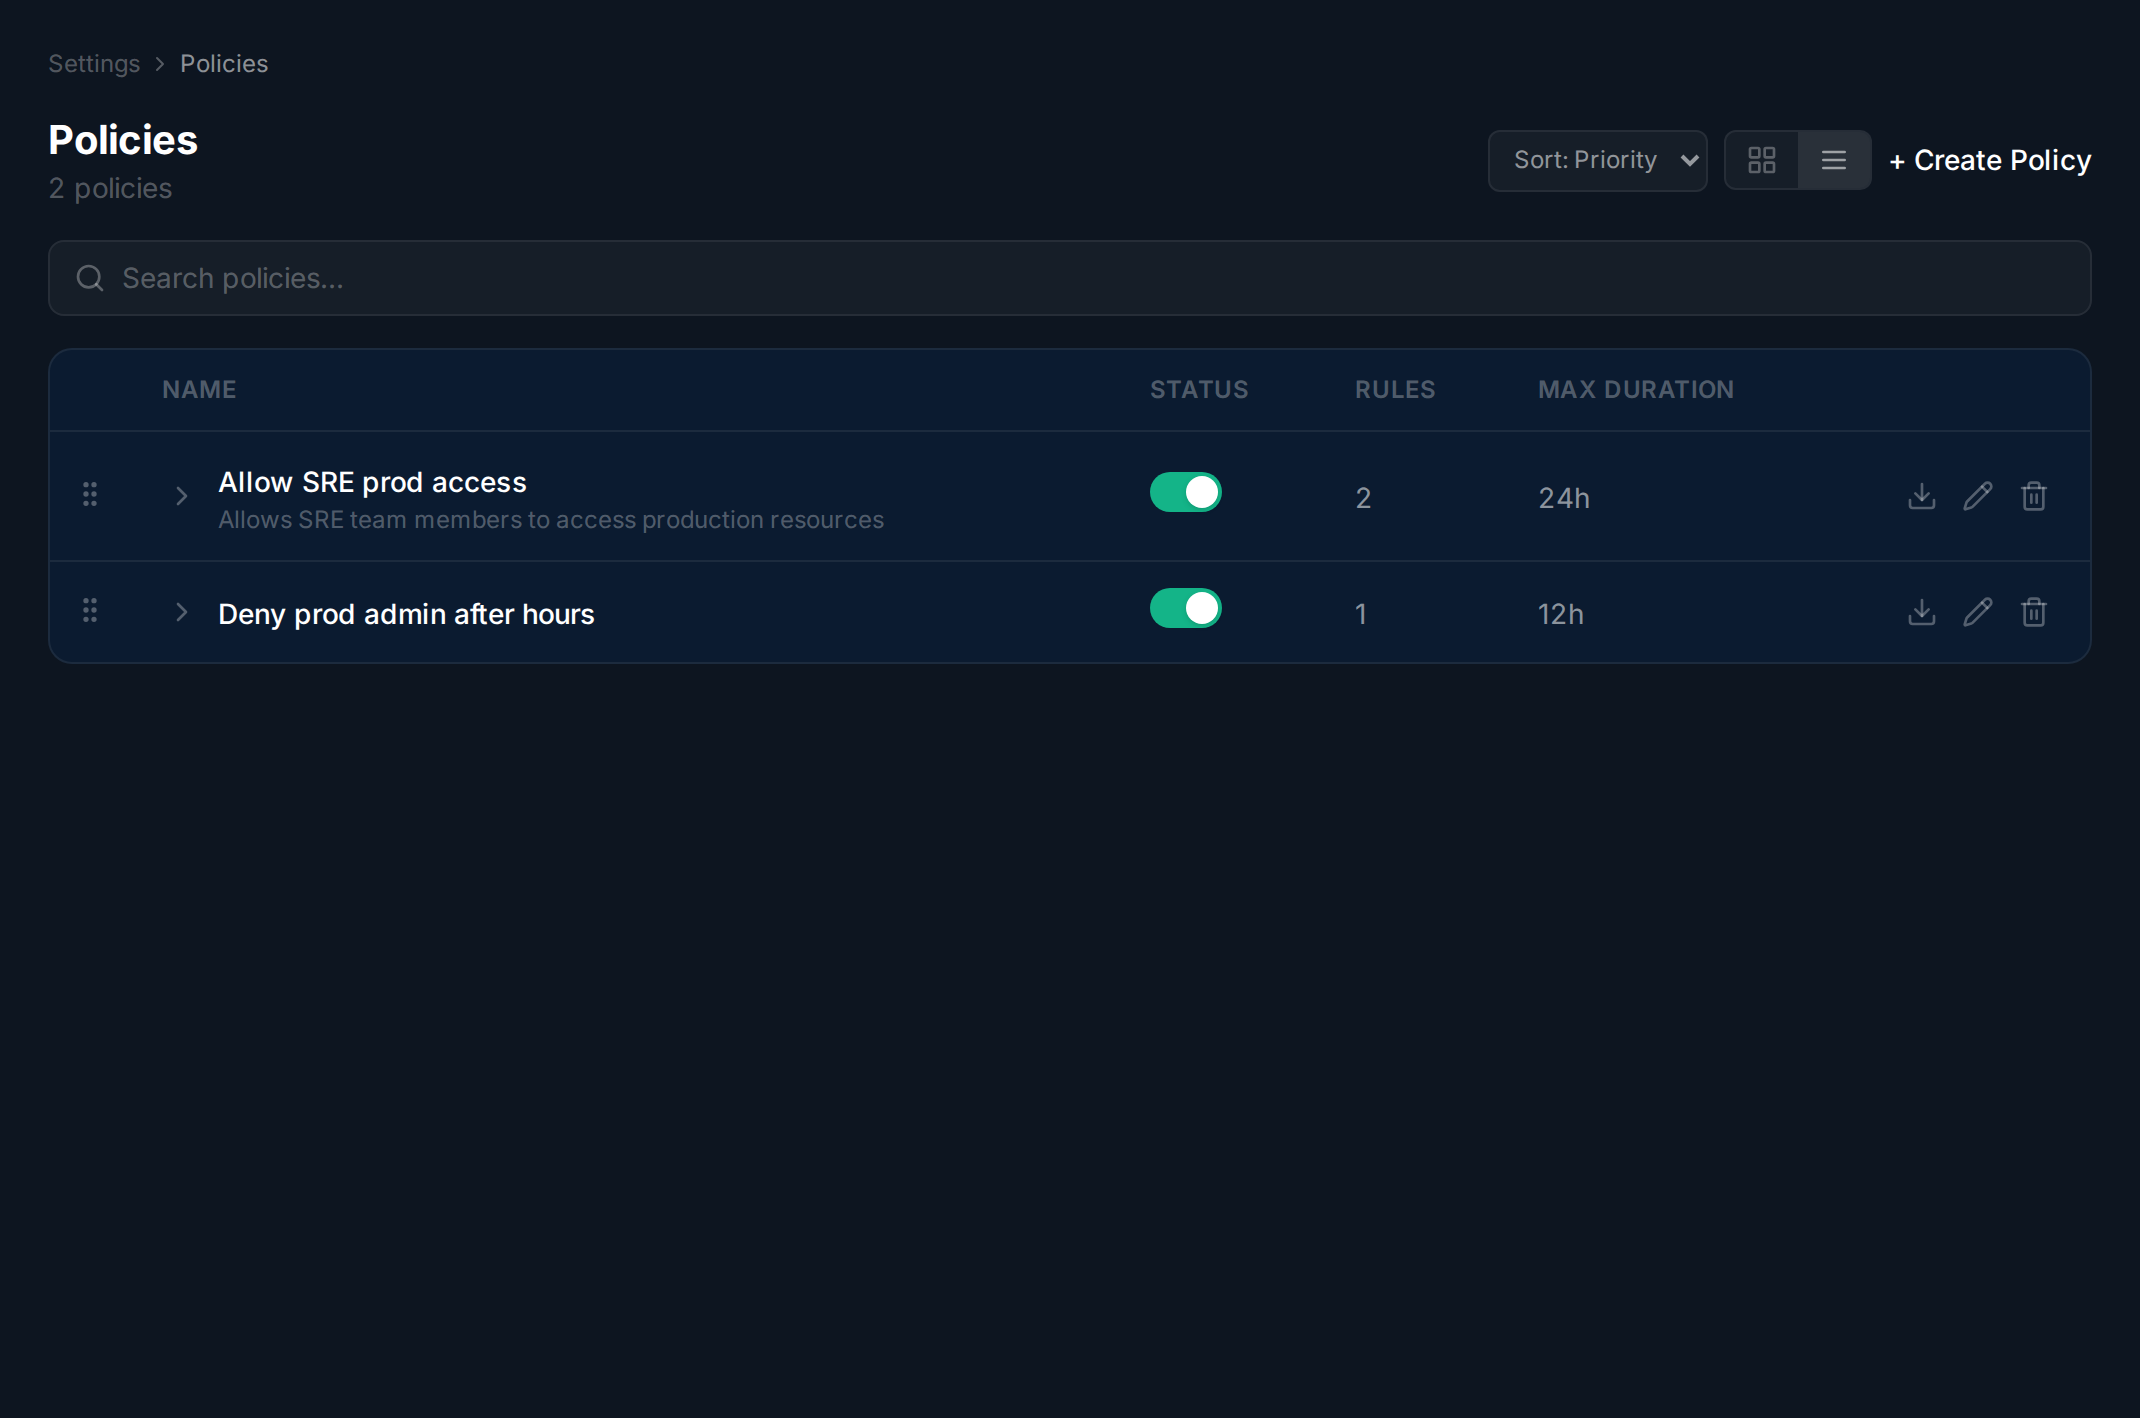
Section titled “Browsing Policies”Navigate to Settings > Policies to view all policies. Each row shows the policy name, status, priority, and rule count. Drag the handle to reorder priority. Use the search bar and sort dropdown to filter the list.
Creating a Policy
Section titled “Creating a Policy”Navigate to policies.
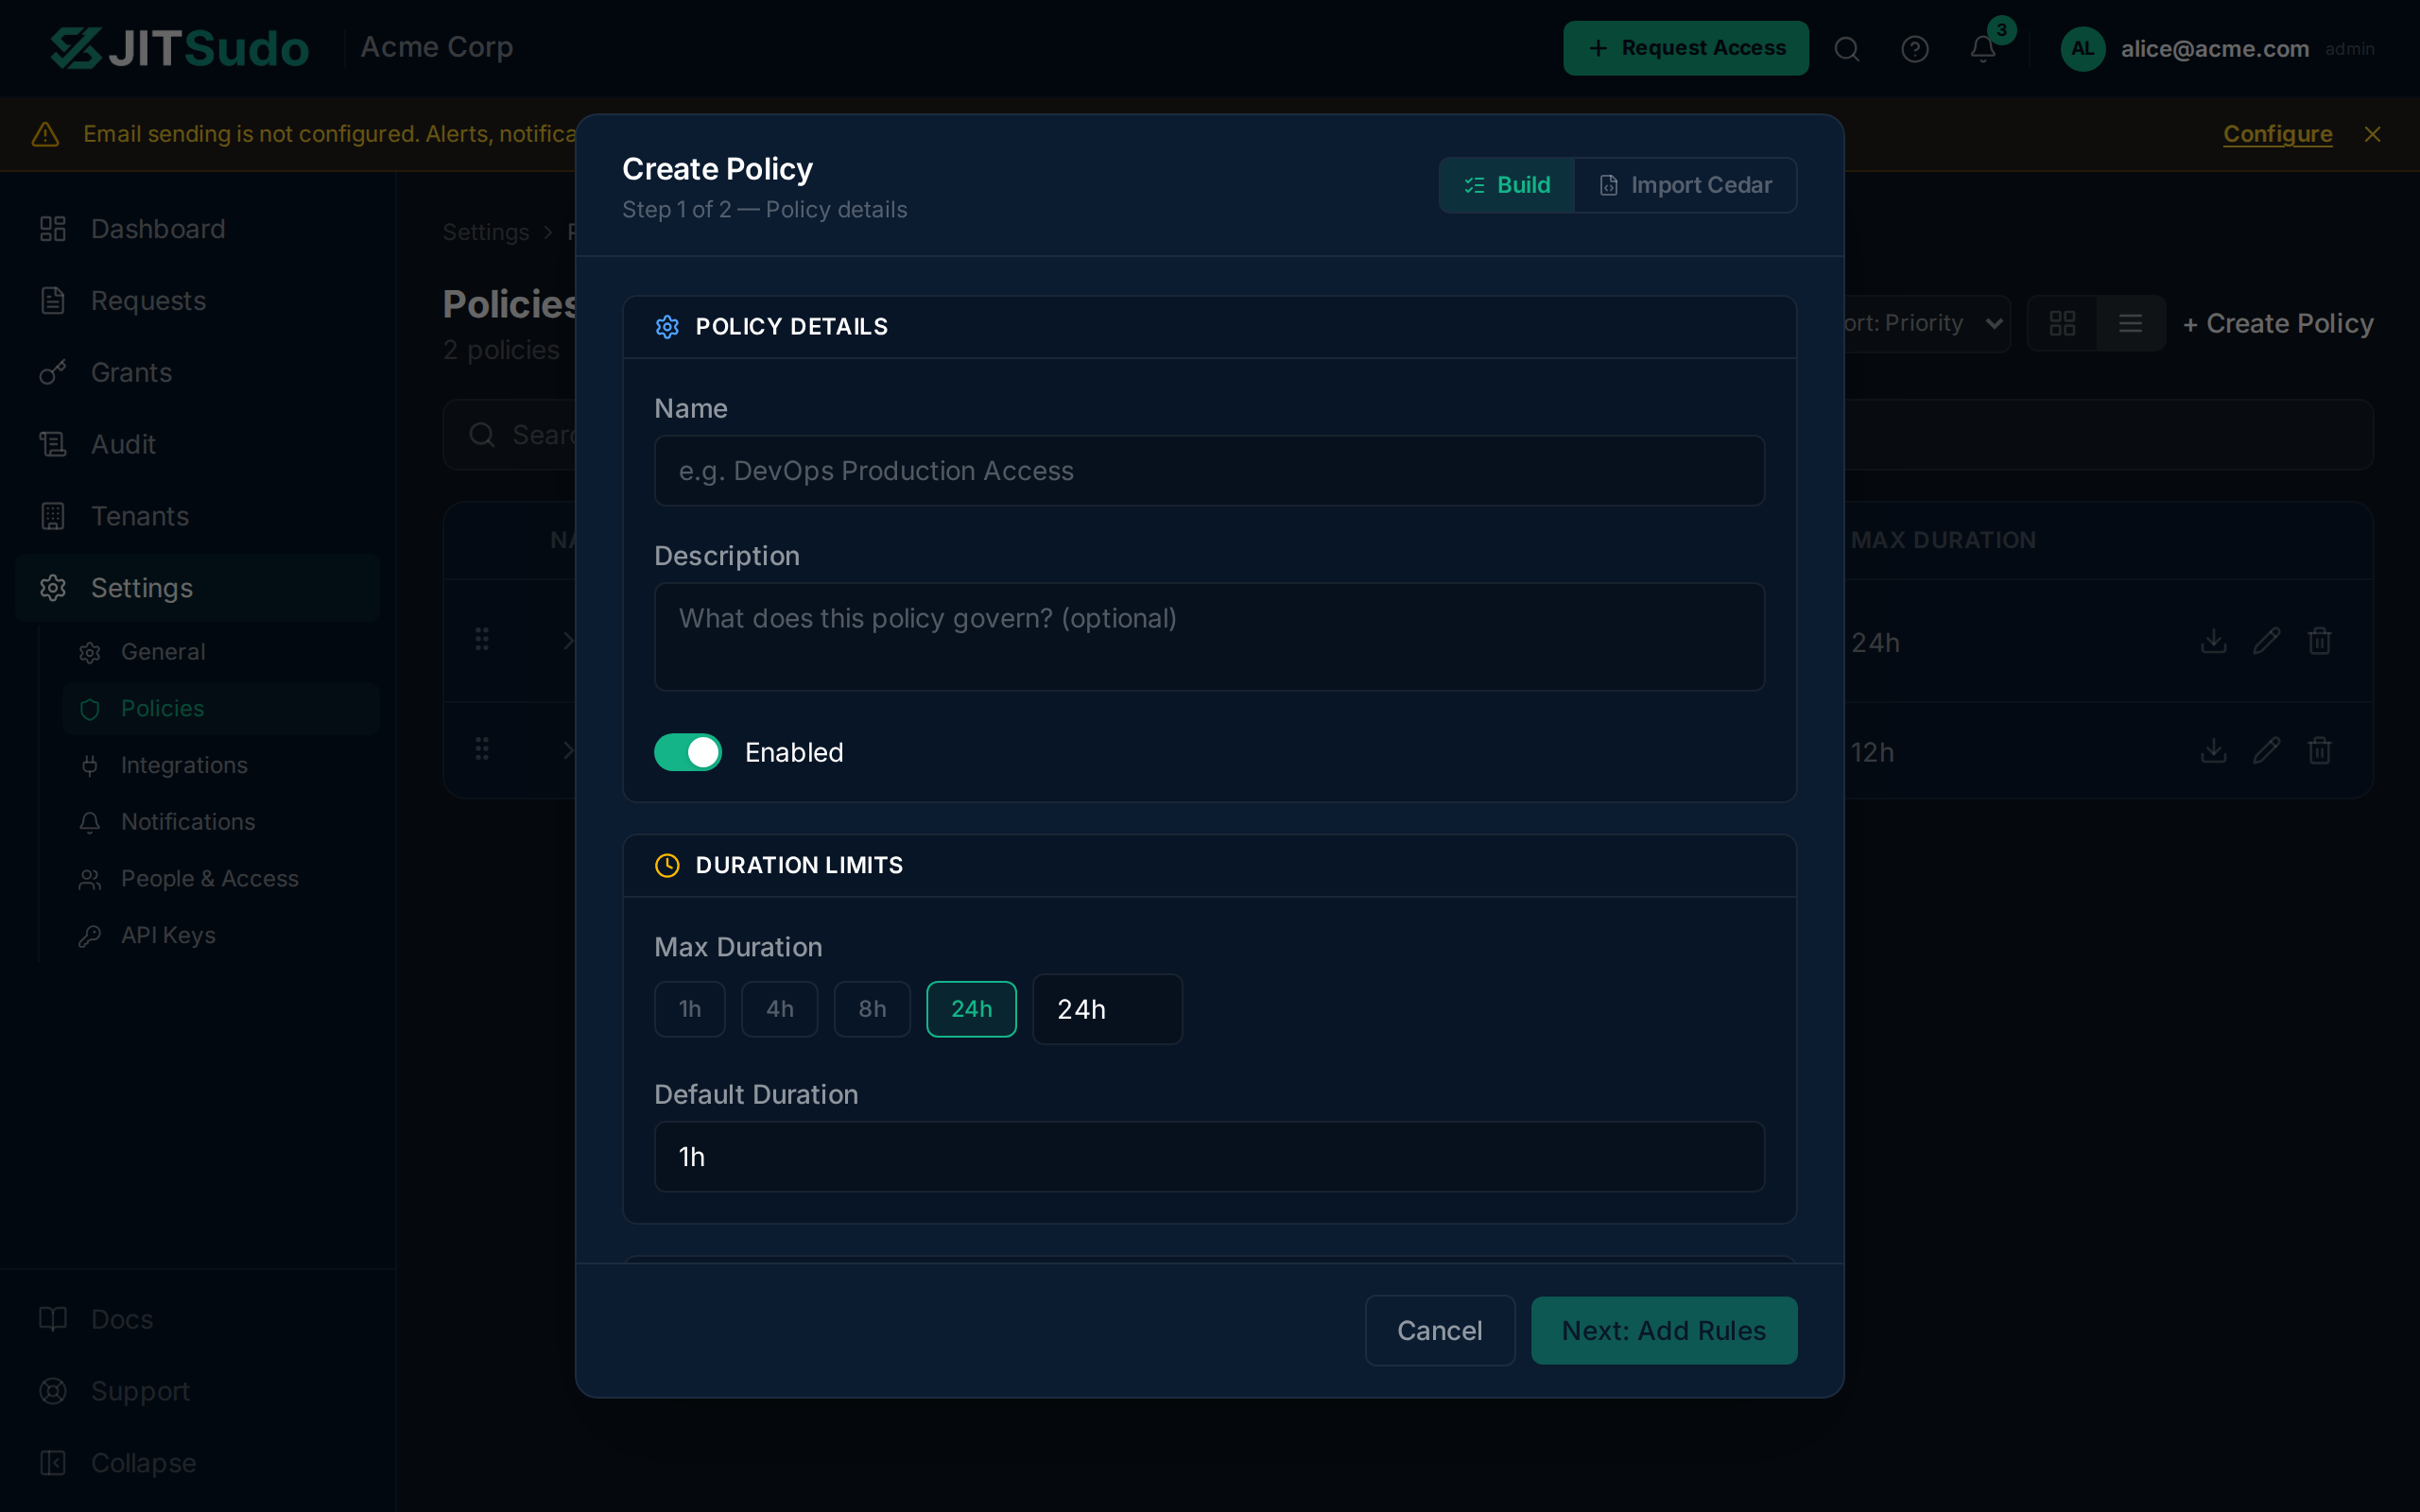
Click Create Policy to open the creation wizard. Enter a name and description on the first step, then add rules on the second step. You can add rules individually via the rule editor or import existing Cedar policy files.
Rule Editor
Section titled “Rule Editor”Navigate to policies.
Open create policy dialog.
Enter a policy name.
Advance to the rules step.
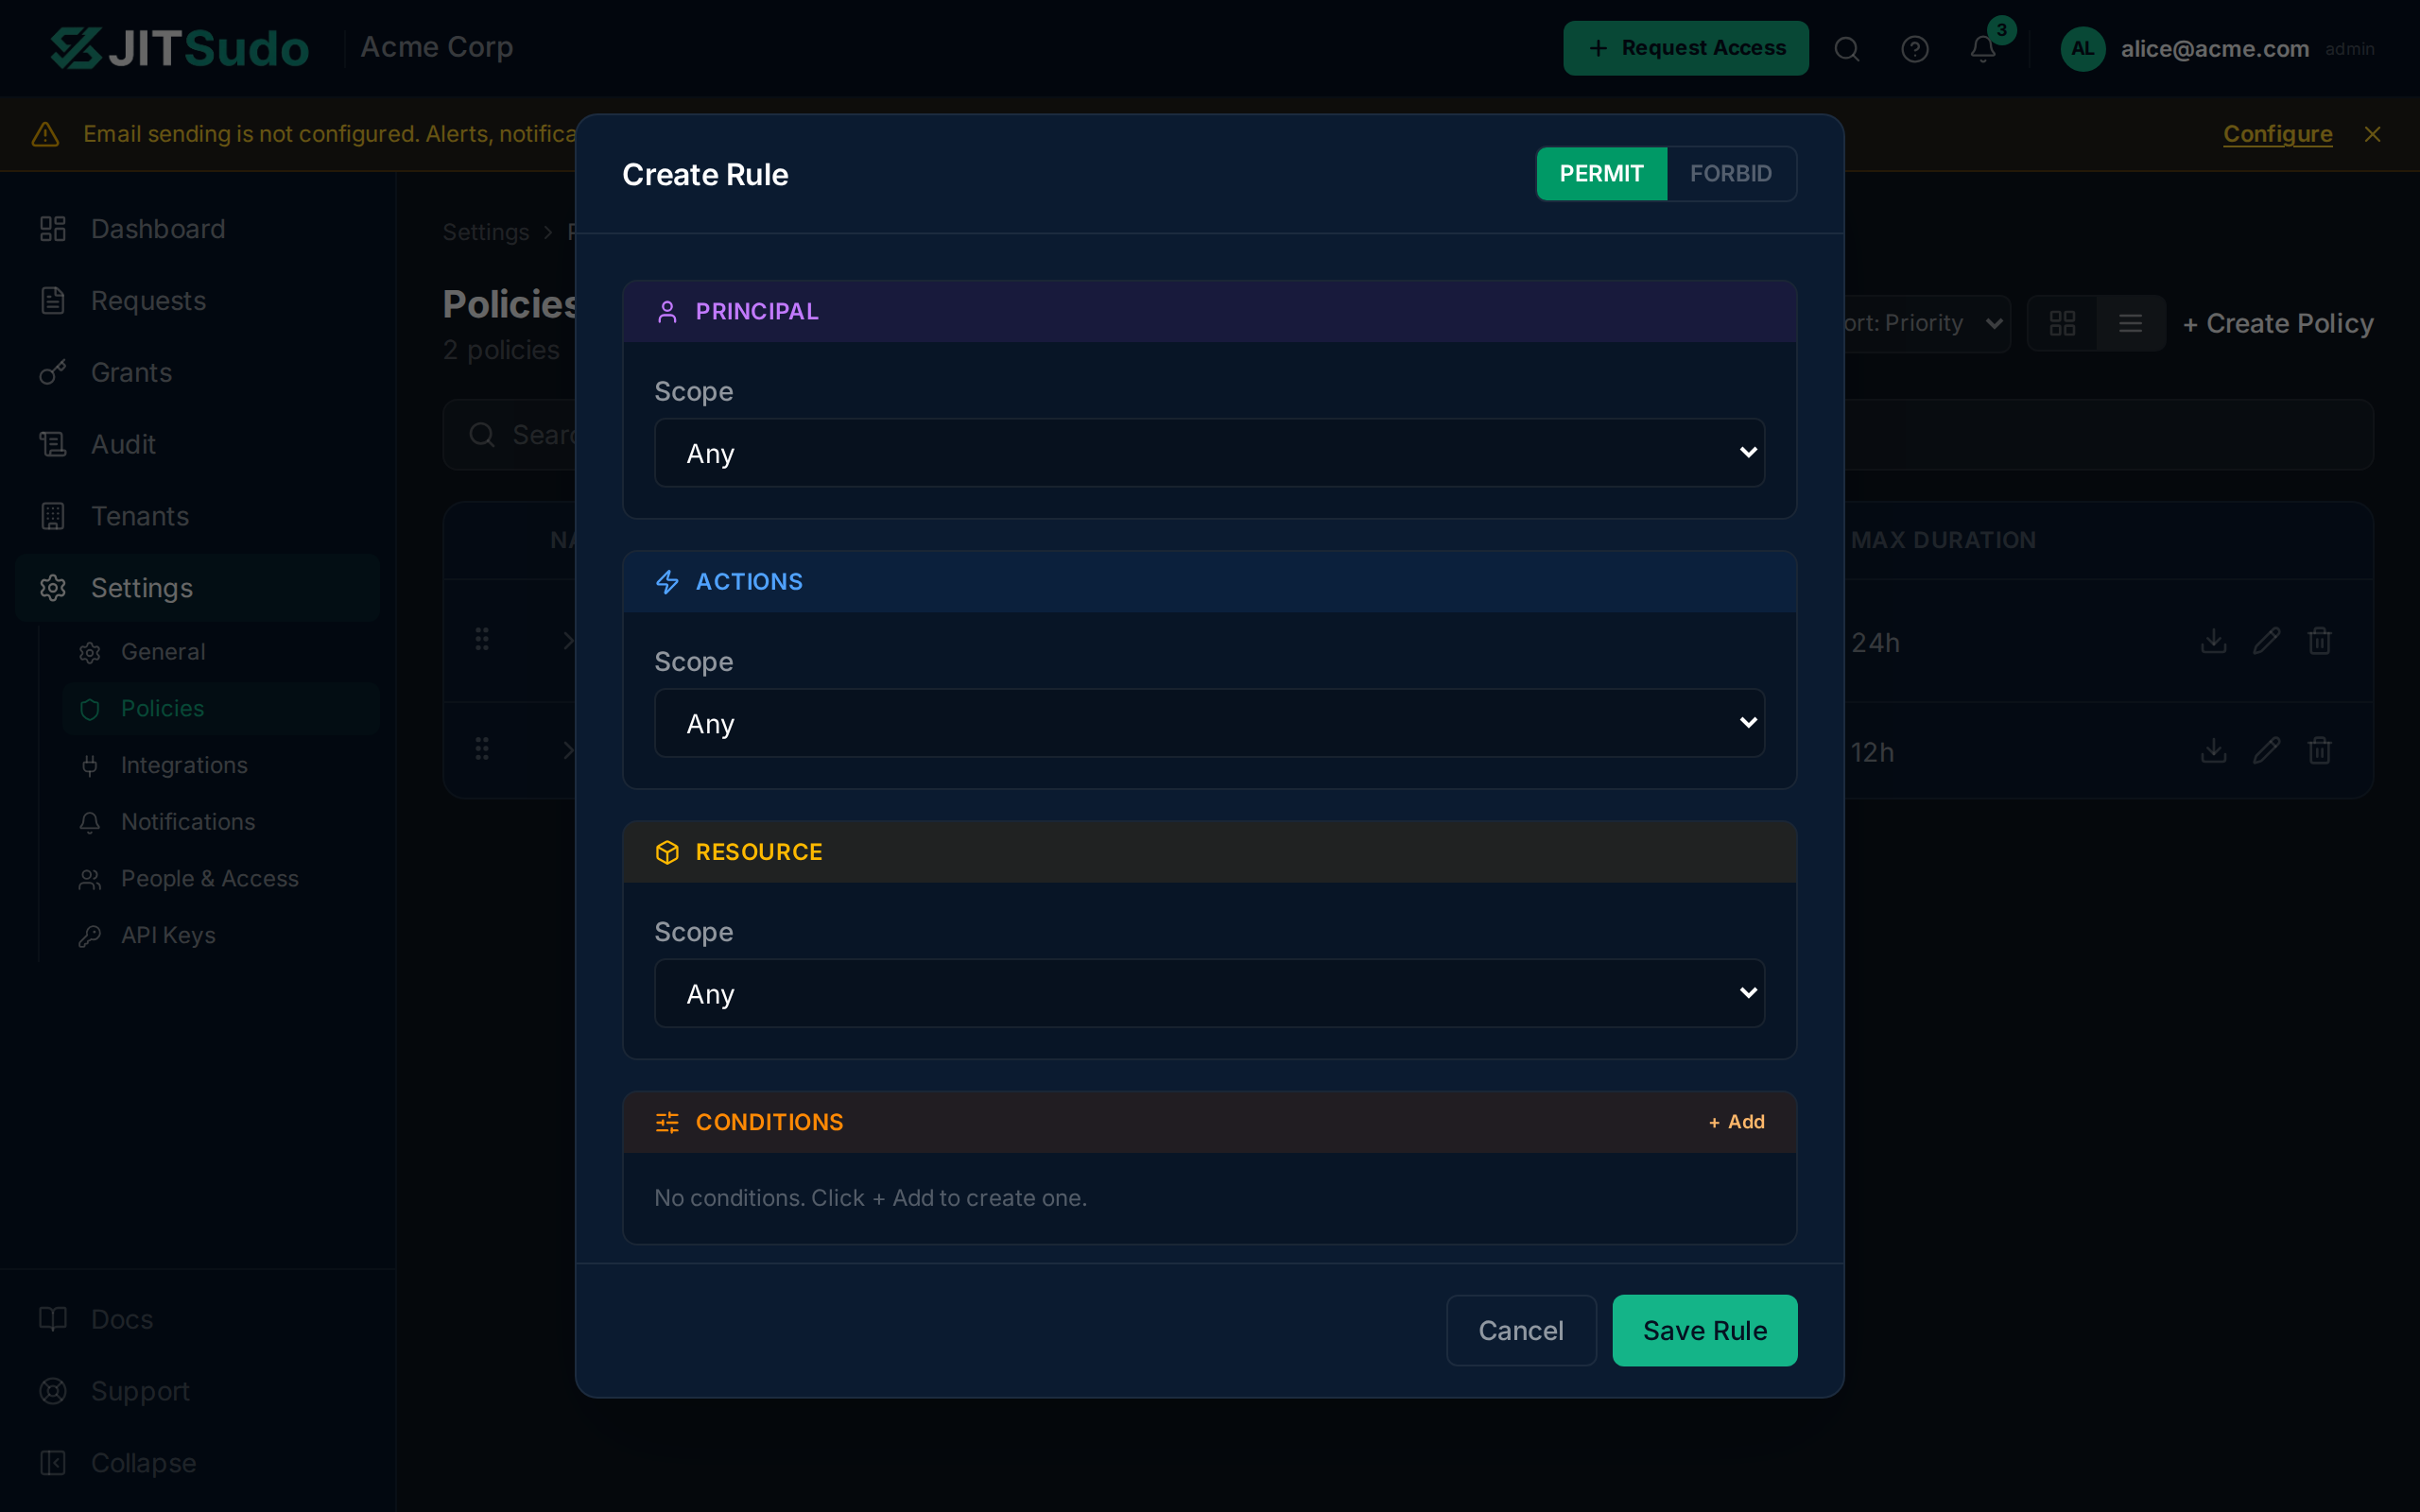
The rule editor lets you build Cedar rules visually. Set the effect (permit or forbid), then scope the rule to specific principals, actions, and resources. Add optional conditions for fine-grained control.
Importing Cedar Policies
Section titled “Importing Cedar Policies”When creating a policy, click the Import tab at the top of the
dialog to switch to import mode. Drag a .cedar file onto the
drop zone or paste Cedar policy text directly into the text area.
The parser detects the number of rules automatically. Click
Create Policy to save.
Managing Existing Policies
Section titled “Managing Existing Policies”Navigate to policies.
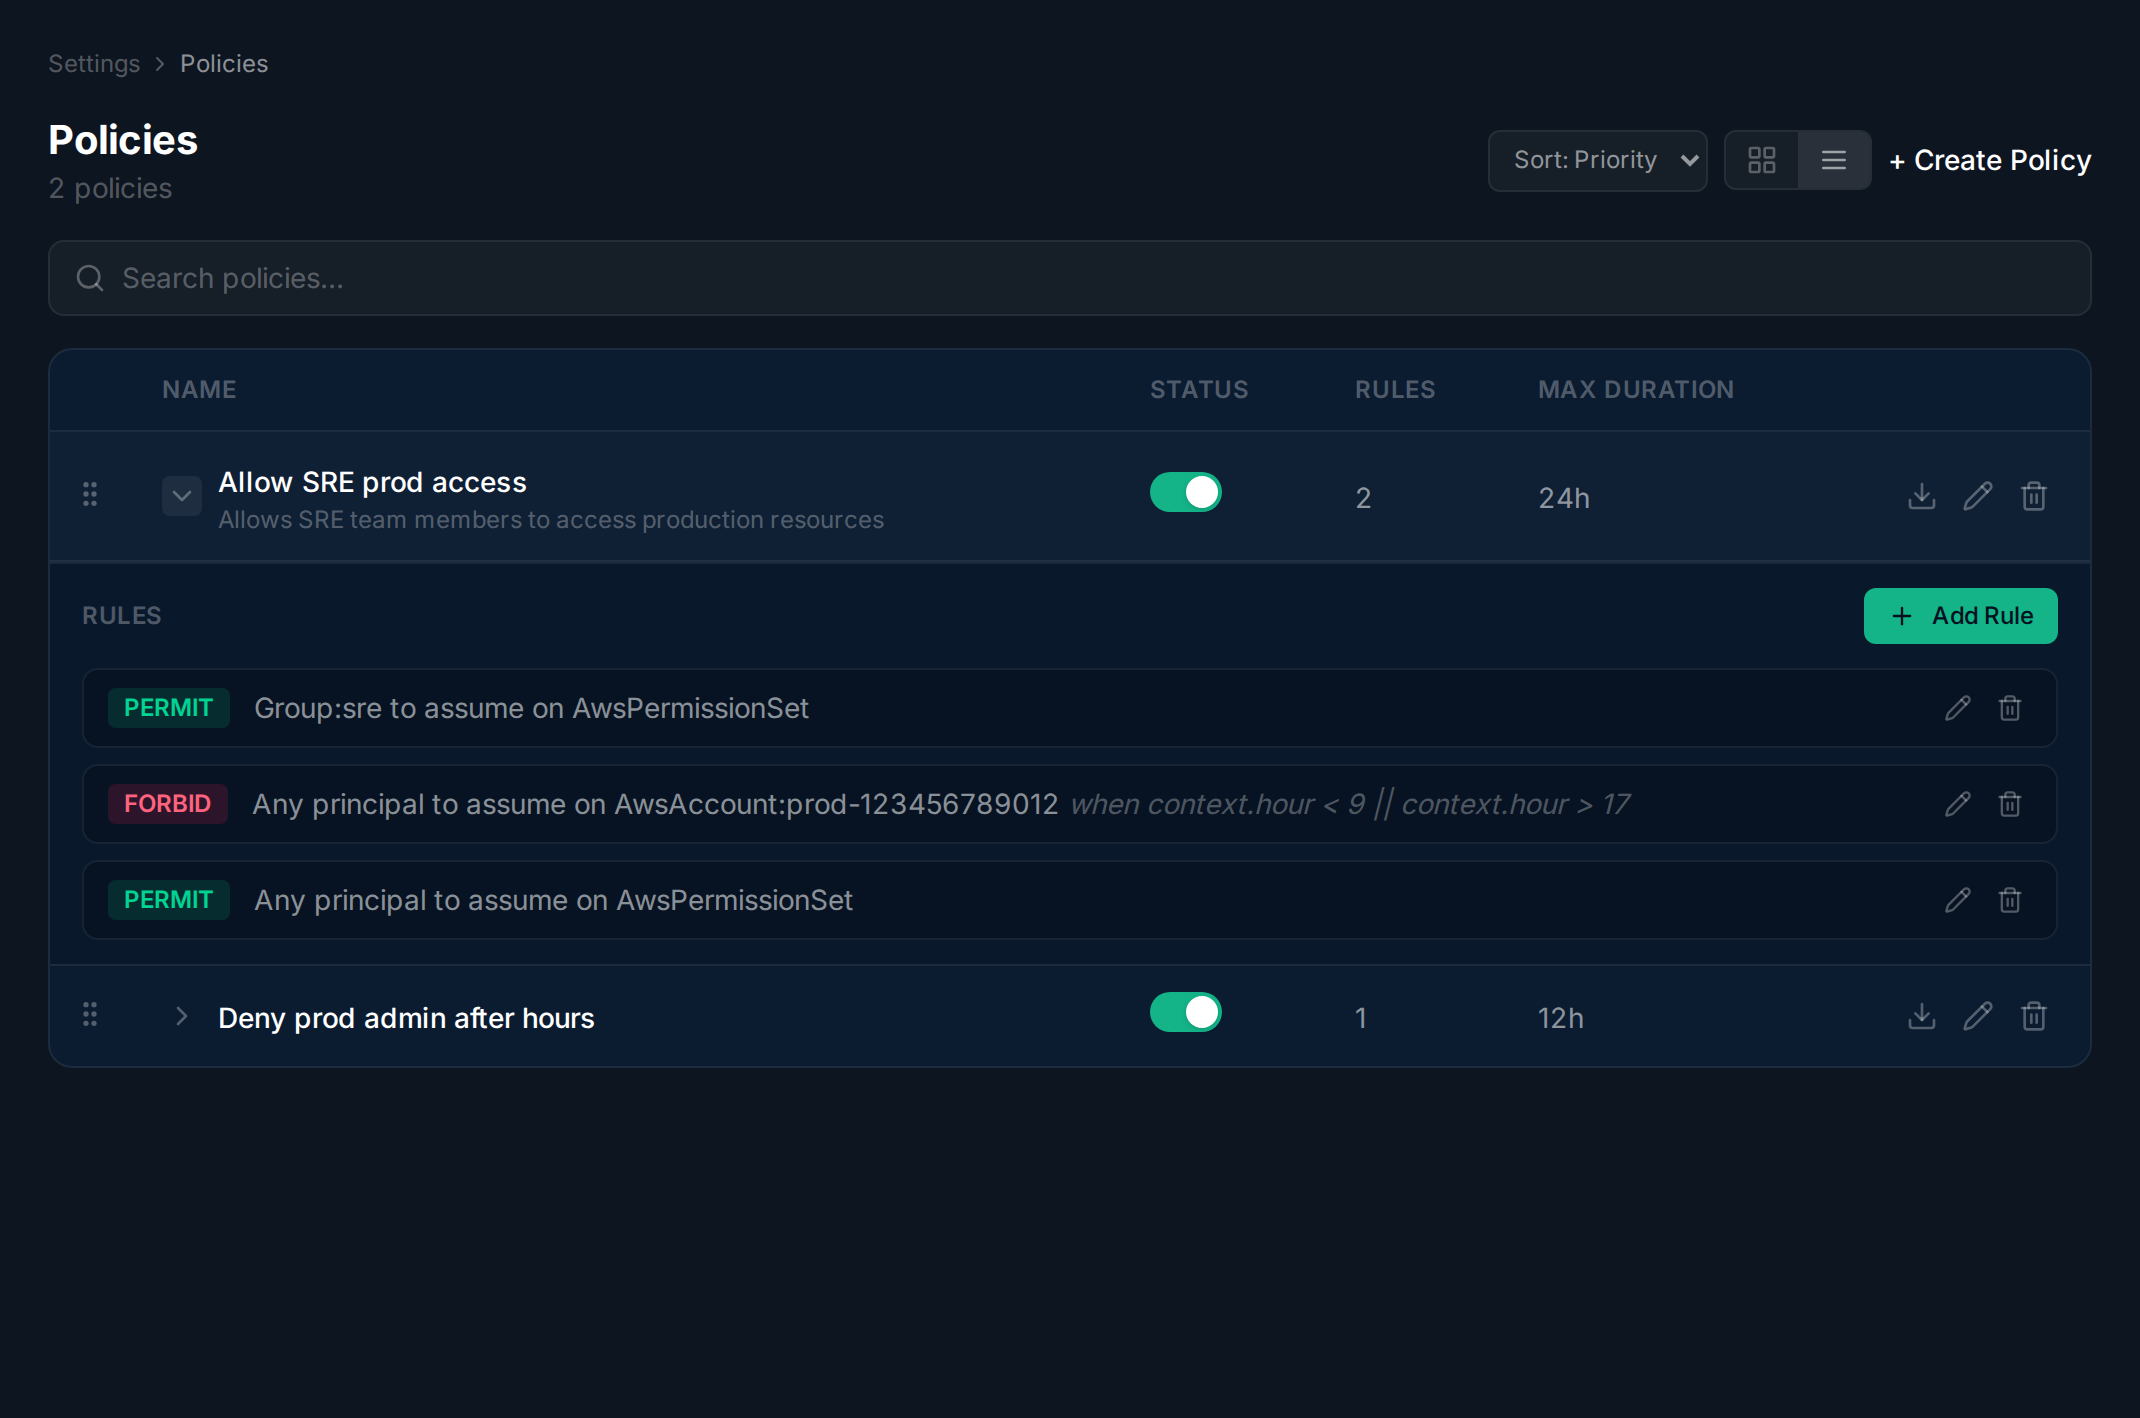
Expand a policy row to see its rules. Each rule shows a one-line summary. Use the row action icons to edit, delete, or download the policy as a Cedar file.
Related
Section titled “Related”Related guides: